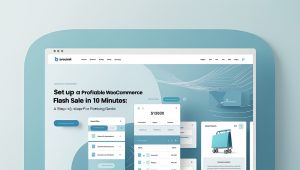
How to Set Up a WooCommerce Flash Sale in Under 10 Minutes
I still remember the anticipation the first time I orchestrated a WooCommerce flash sale. I was armed with spreadsheets, a mindset locked on impending success, and a healthy dose of caffeine. I picked a discount, updated product prices manually (the hard way), and shot out an announcement to my eager email list. I imagined orders rolling in—dollars dancing around my website like confetti. However, after 24 hours of a lackluster performance, I was left staring at a heap of abandoned carts. What went wrong?
The offer itself had glimmering potential. But upon digging into the data, I realized the root of the problem lay not in the product or pricing, but in the setup. WooCommerce’s built-in features cater primarily to year-round promotions, lacking the urgent, adrenaline-pumping deadlines that compel customers to hit ‘buy’ instead of ‘leave’. The experience felt akin to inviting guests to a party devoid of snacks or drinks—the appeal just isn’t there!
I knew I had to make a change. A little research revealed the holy grail: combining **Advanced Coupons** and **FunnelKit**. These plugins transformed my sales game. They offered me the gift of automated scheduling, discount applications sans codes, and defined deadlines that actually prompted customer action.
In my subsequent flash sale, enhanced by these powerful tools, I saw results that eclipsed anything I’d achieved manually. I want to share this journey with you. Buckle up; I’m here to guide you through the exhilarating setup of a complete WooCommerce flash sale step-by-step.
What You’ll Need Before We Start
Before diving headfirst into this digital carnival, assemble your toolkit. You’ll need:
- WordPress with WooCommerce already active and a few products loaded.
- Advanced Coupons Premium (a yearly investment of $249 for the All Access Bundle) to enable those glorious auto-apply discounts.
- FunnelKit Basic ($99.50/year)—this beauty oversees the checkout expiration.
- (Optional) aThemes Merchant, OptinMonster (Growth plan or higher), and TrustPulse for added flair.
- It’s strongly recommended to have a staging site to test the setup.
Why Flash Sales Work
Now, let’s brush up on why these flash sales are like rocket fuel for conversions. They capitalize on two of the most potent human motivators: eye-watering discounts and non-negotiable deadlines. How does this magic play out in your WooCommerce store?
- Higher Conversion Rates: Urgency replaces hesitation, pushing browsers into buyers.
- Predictable Revenue Spikes: You can orchestrate sales when it suits your inventory needs—like a maestro leading a musical crescendo.
- List Re-engagement: A well-promoted flash sale rewards loyal subscribers and brings back those customers who may have forgotten about you.
- Inventory Cleansing: Targeting slow-selling stock through time-sensitive sales helps clear shelf space faster than you can say “restock.”
Part 1: Core Setup
Ready to get your hands dirty? The following steps are all about creating your foundation. Trust me; it’ll take you less time than brewing an artisanal cup of coffee.
Step 1: Create the Flash Sale Discount with Advanced Coupons
Install and activate Advanced Coupons from your WordPress plugins section. It’s time to conjure your flash sale discount! Head straight to **Marketing » Coupons** on your dashboard; click ‘Add Coupon.’
Ditch the mundane and come up with a unique internal name. Perhaps “flash-june-9” could spark joy? Set the discount type to ‘Percentage Discount,’ and enter a value in the sweet range of 20-40%. The specifics depend on your margins, but keep it tempting!
Then, navigate to that shiny **Scheduler** tab flying in courtesy of Advanced Coupons. Set your start and end dates to the minute; let’s not be vague here. Misinformation can derail even the most meticulously crafted plans.
Don’t forget to maneuver to the **Cart Conditions** Tab; you’ll need to add a cart condition of Cart Subtotal with a minimum of $0.
From this point on, I want you to enable auto-apply.
Click **Publish** and voilà! Your flash sale discount is now automated and poised for action!
Step 2: Add Checkout Urgency with FunnelKit
Once a customer has their items in their cart, the checkout page is where the magic needs to happen. FunnelKit is here to sprinkle that urgency dust. Install it, then navigate to **FunnelKit » Store Checkout**.
In your Store Checkout view, find the **Optimizations Tab** and open the **Time Checkout Expiry Panel**. Flip the “Close Checkout After Date” switch to “Yes,” entering the exact date/time for your flash sale termination.
This reinforcement of urgency ensures any shopper who misses their chance is redirected away from the checkout page. Trust me, your ‘fear of missing out’ (FOMO) will do wonders here!
Part 2: Boost Your Results
Feeling adventurous? Let’s ramp up those results. While the core setup gives you a great jumpstart, think of these as additional instruments in your marketing orchestra.
Step 3: Display Sale Badges on Products with aThemes Merchant
Visibility is everything, darling! Grab the aThemes Merchant extension to showcase your sale like a neon sign. Activate